Thank you for visiting Indian Foods All Recipes, Appadalu / Papads, Baking Recipes ,Bibingka, Biryani, Breakfast,Cakes, Chinese style, Cookies, Currys, Dosa, Drinks, Festival Recipes, Hearty Meals, Launch, Masala, Powders, Miscellaneous, Non-Veg Recipes, Pickels, Rices, Salad, Sandwiches, Snaks, Soups, Sweets, Tips, Vegetables Recipes click here. Enjoy your stay!

Boiled Rice Fritters

Boiled Rice Fritters
Annam Pakodilu.

Steamed rice or any leftover boiled rice is mixed with spices and besan / gram flour. The mixture is then dropped into hot oil and deep fried till golden brown in color. Serve boiled rice fritters with ketchup or with any chaat chutney.
Makes: around 2 Cups of Boiled Rice Fritters.

Ingredients:

Steamed Rice 1 1/2 Cups
Besan 4 Tbsps
Onion 1
Green Chiles 1 – 2
Ginger 1 inch Piece
Plain Yogurt 1 Tbsp
Turmeric Powder a Pinch
Red Chile Powder few Pinches
Cumin Seeds 1/2 tsp
Asafoetida a Pinch
Cilantro few Sprigs
Curry Leaves 2
Salt to taste
Oil for Deep Frying

Method of preparation:

Peel and slice the onion.
Remove stems, wash and finely chop the green chiles.
Wash and finely chop the cilantro and curry leaves.
Peel and mince the ginger.

In a mixing bowl, add all the ingredients expect oil.
Add a splash of water and warm up the rice in microwave for half a minute if using leftover rice.

Mash up the rice and make a wet mixture out of the ingredients in the mixing bowl.
Add more water or yogurt if necessary.

Heat oil in a deep frying pot on medium high heat.
Scoop up the mixture in the bowl and drop into hot oil.
Deep fry the rice until its golden brown in color.
Remove the deep fried rice pakodi onto absorbent paper.
Repeat the same with any remaining boiled rice mixture.
Serve boiled rice fritters with any chutney or pickle or ketchup.
Notes: Make sure to get the wet mixture right.

Suggestions: For much crispier version of the pakodi, deep fry the fritters again on high flame after removing all the rice fritters onto absorbent paper.
Variations: You can also check other snacks here.
Other Names: Boiled Rice Fritters, Annam Pakodilu, Rice Pakodi.

Via Talimpu

Kajjikayalu


While chatting casually a couple of days ago, my sister Siri had mentioned that she had a large quantity of endu kobbari / dried coconut shells and was thinking of making kajjikayalu. Though she got the recipe from me, she requested to post it for future references and so here it is.
Kajjikayalu are a part of Andhra 'pindivantalu' - the festive dishes, besides many other mouthwatering sweets and savories like bobbattlu, boorelu, ariselu, ladlu, garelu, pulihora, janthikalu, aavadalu and many many more. :) These half moon shaped, crisply fried shells with a sweet filling inside are a true treat for anyone's taste buds. There are several fillings to go inside the shells but today I am posting the version of coconut - sugar filling accentuated by the aromatic cardamom. Though they fall under the sweet category, kajjikayalu are not overtly sweet as typical Indian mithais do since the outer shell is not sweeter. One can hence enjoy at least a couple at a time. I have thrown diet rules off the window and have been enjoying 3 - 4 per day. :)

Recipe Source: My mother
Time needed: About an hour
Quantity: 25

Ingredients to make kajjikayalu:
For the outer shell:
2 cups maida
a pinch of salt
For the filling:
2 cups grated copra / endu kobbari
1 cup sugar
1 tsp cardamom powder
To fry:
2 -3 cups of oil

Making kajjikayalu:
* Combine the flour and salt in a mixing bowl. Gradually add water and make a thick dough like poori or chapathi dough. (I used about 1 cup minus 3 Tbsp of water.). Let it rest for about 30 minutes.
* Place the coconut, sugar and cardamom in a food processor or blender on pulse mode and run for a few seconds to end up with a slightly homogeneous mixture. This filling can be prepared in advance.

Photobucket

* Heat the oil in a banali / kadai. If you don't own one, any deep bottomed nonstick pan would also work. To know whether the oil is hot enough, put a pinch of dough into the hot oil. If it sizzles and comes to surface immediately, then it is ready.
* Meanwhile, divide the dough and shape into small balls. Roll each ball into a thin poori, slightly bigger than the circumference of kajjikaya mould. Spread the rolled out poori on the greased mould.


* Place a couple of tablespoons of the filling in it. Take care that the filling is in the center and not along the edges. If the filling is on edges, you can not seal them.


* Fold the mould and press it firmly so that the filling doesn't come out during the frying process. Trim off the extra dough, outside the mould and put it back into the dough container.


* Now open the mould, gently lift off the kajjikaya and place it on a plate.


* Prepare at least 4 -6 of these and start frying. When frying the first batch, you can prepare the shells for the next batches. Also remember to grease the mould each time you use it, to avoid the shell sticking to it.


* Deep fry the kajjikayalu on low flame till they turn golden brown and crisp. Fry as many kajjikayalu as your kadai can fit without overcrowding. Frying on low flame is crucial in this recipe to achieve the crispiness of the outer shell of kajjikayaku. If fried on higher flame, they brown quickly and the shell would be softer as a roti or poori.

Note:
1. Kajjikaya mould is the gadget needed for this recipe. It is foldable in half and in helps in getting the needed semi circular shape of a kajjikaya and also helps in sealing the edges.
2. If you don't own a mould, place the filling on one half of the rolled out dough. Wet your fingers with water and run around the edges. Fold the other half over the filling so that it is semi circular in shape and seal the edges firmly. If the edges are not sealed properly, the filling would spill out into the hot oil.
3. If the outer shell of the fried kajjikaya seems to be softer, put it back to the hot oil, and fry on low flame till it turns crisp. Using low flame is the key to success in this particular recipe.

They are going to my CFK - Festive Foods, an event originally started by Sharmi.

Via Veggie Platter

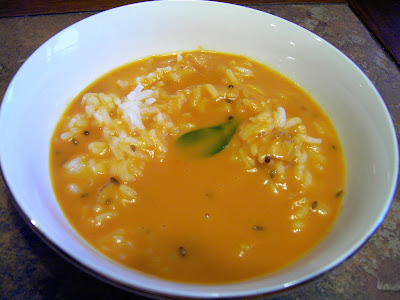
Tomato che Saar


Fall is the perfect season to slurp this delicious "saar".


Tomato che Saar
Tomato Broth/soup
Ingredients

  • salt to taste
  • 1 1/2 tbsp jaggery
Pressure Cook
  • 4 medium tomatoes, washed, make X with a knife on each tomato
  • 1 cup water
Grind to a fine paste
  • 1/4 cup fresh coconut
  • 1/2" ginger
  • 1 - 2 green chilies (or to taste)
  • 1/2 tsp cumin seeds
Tempering
  • 2 tsp toop/ghee/clarified butter
  • 1/2 tsp cumin seeds
  • 1/2 tsp mustard seeds
  • 1 sprig curry leaves
  • a pinch of asafoetida
Garnish
  • 1 tbsp chopped cilantro - optional
Suggested Accompaniment
  • Plain rice
Method
1. Make a X slit on the tomatoes and pressure cook with water. Let them cool down. Now peel the tomatoes starting from X
2. Grind coconut paste and set aside.
3. Grind peeled tomato pulp and set aside.
4. Heat ghee in a saucepan. Add cumin seeds, asafoetida and curry leaves.
5. As it splutters, switch the gas to low. Add tomato pulp and coconut paste.
6. Add 2 -3 cups water to get the desired consistency.
7. Add salt & jaggery. Switch the gas to high. Bring to a rapid boil.
8. Switch gas to low. Simmer for 5 minutes.
9. Garnish with chopped cilantro - if using.

Note -
1. Scouring X mark on tomatoes while boiling is the tip I saw on the food network. It helps to peel boiled tomatoes faster.
2. You can pass the boiled tomato pulp into strainer to avoid any seeds. I think of it as a good source of fiber. To be honest, I do not peel tomatoes either. But then it's a personal choice. Because peeled & strained saar willl taste better.
3. Instead of adding coconut in grinding, you can also add thin coconut milk when the curry is simmering.


Via Enjoy Indian Food

Capsicum & Tandoori Tofu Rice

Tandoori tofu bites are always welcome here, everyone at home love this bites just as appetiziers..This time i tried making a rice by combining tandoori tofu bites and capsicum, both together turned out the rice more flavourful, tasty and quite a filling rice..This rice goes prefectly even for a lunch box menu and this rice doesnt even need any special side dish...Also its an excellent way to feed whoever never like tofus..Yeah along with rice, they dont even notice these bites and will enjoy them, if u dont like capsicum u can very well add ur favourite veggies in this rice..Simple, easy and quick rice gets ready in less time, u can also prepare this rice with leftover cooked rice anytime..

Tandoori Tofu & Bellpepper Rice
Ingredients:
  • 2cups Cooked rice
  • 1cup Capsicum (chopped)
  • 1cup Tofu (extra firm & cubed)
  • 1no Onion( big& chopped finely)
  • 2nos Green chillies (slit opened)
  • 1tsp Cumin seeds+Fennel seeds
  • 1tsp Tandoori masala powder
  • 1tsp oil
  • 1/2tsp Coriander powder
  • 1/2tsp Pepper powder
  • 1tsp Garam masala powder
  • Salt
  • Oil
  • Few coriander leaves (chopped)
Method:
Add the tandoori masala powder, oil and salt to the cubed tofus and mix gently..Cook in microwave oven for 5-7minutes in high until they turn bit crispy..keep aside..

Heat enough in a pan, fry the cumin seeds and fennel seeds, add immediately the chopped onions, slit opened green chillies ,sauté everything for few minutes until the onions turns transculent..Add the chopped capsicum, along with pepper powder, garam masala powder, coriander powder with salt, sauté for few minutes, take care not the overcook the capsicum chunks, now add the cooked rice, toss everything gently, finally add the already prepared tandoori tofu bites and coriander leaves to the rice, mix gently..

Serve with papads or with eggs.

Via Priya's Easy N Tasty Recipes

Microwave Cornmeal Laddoos

I never ever thought of making laddoos with cornmeal before, but this weekend since my sweet tooth craved for something sweet, i tried out this cornmeal laddoos as i didnt have rava..Cornmeal laddoos goes for few minutes and its get ready within less than 10minutes in microwave oven, once i prepared this cornmeal laddoos we didnt stop munching them and we loved it..This cornmeal laddoos goes exactly the same cooking process as we do for rava laddoos, believe me or not am gonna prepare this laddoos very often since everyone at home loved this cute looking laddoos..This laddoos stay best for 2-3days in room temperature if they are conserved them in air-tightened box..

Cornmeal Laddoos
Ingredients:
  • 1cup Cornmeal
  • 1/2cup Sugar
  • 2tsp Ghee
  • 2nos Cardamoms
  • Milk (as per need)
  • Few cashew nuts
Method:
Heat the ghee and cashewnuts for a 2-3 minute in microwave safe bowl in microwave oven, take the roasted cashew nuts and keep aside, add the cornmeal to the heated ghee, mix everything well and cook for 5-7minutes high (stir in between twice)..take out the roasted cornmeal and grind this cornmeal along with sugar and cardamom as bit coarse powder, take this grounded powder along with roasted cashew nuts in a bowl, sprinkle the milk as per need mix everything well and make medium sized balls..

Arrange this laddoos in an air tightened box and enjoy..


Via Priya's Easy N Tasty Recipes

Wheat Flour Coconut Burfi

Wheat Flour Coconut Burfi
Goduma Pindi Kobbari Burfi.

This is a quick and tasty burfi with whole wheat flour. Wheat flour is roasted in ghee till it turns light golden in color. Then the grated jaggery and dried coconut powder is added to the wheat flour. Milk helps in moulding the wheat flour mixture into burfi or ladoo.
Makes: around 12 Wheat Flour Coconut Burfi.

Ingredients:

  • Wheat Flour 1 Cup
  • Jaggery 3/4 Cup
  • Sesame Seeds 3 Tbsps
  • Dry Coconut Powder 1/4 Cup
  • Ghee 2 Tbsps
  • Milk 1/8 Cup

Method of preparation:

Grease a 7 X 5 inch dish with a drop of ghee and keep aside.
Mash the jaggery into powder without any big chunks with help of a pestle.
Grind dry coconut pieces into fine powder using a spice grinder.

Heat ghee in a nonstick pan on medium – low flame
Add wheat flour and fry for around 5 minutes by stirring continuously.
Once wheat flour turns to light golden color, stir in jaggery powder, dry coconut powder and sesame seeds.
Cook on low flame till the jaggery starts to melt (around 2 minutes).
Add milk to wheat flour mixture which makes it turn wet and crumbly.

Pour the cooked wheat flour mixture into greased dish.
Press the warm wheat flour mixture with back of a small bowl or wide spatula to tighten it into a block.
The top becomes soft and while the mixture is little warm, make perforations to cut later into 2 inch blocks.
Let the golpapdi cool off to room temperature before you carefully cut them again into pieces.
Store tight in a clean dry jar and serve wheat flour burfi as a snack or dessert.
Notes: Make sure not to overcook once the jaggery is added.

Suggestions: Warm up the jaggery in microwave for couple of seconds to ease the mashing with pestle. Cooking jaggery for long time might harden it and its practically impossible to form the mixture into a burfi or laddu.
Variations: You can also add any sort of dried nuts or dried fruits to the wheat flour mixture. You can also make the wheat flour mixture into small balls by greasing the hands with little ghee.
Other Names: Wheat Flour Coconut Burfi, Goduma Pindi Kobbari Burfi.

Via Talimpu

Microwave ABC Halwa


Before anyone starts wondering whether I am cooking with alphabets, let me assure you that those letters stand for the healthiest and yummiest fruits and the vegetable that star in this delicious and colorful halwa. A for apple, B for banana and c for carrot, you see. The sweet and juicy apple, the vibrant colored crunchy carrot and the humble banana together form a melt in mouth and visually appealing halwa.
I moved to this country a dozen years ago, with minimal culinary skills. I guess I managed to cook 'everyday meals' decently. The real problem was when I had the urge to prepare something special at odd hours when I couldn't call my mother. Then the dear Internet would come to my rescue. At that time, only a few sites were dedicated to Indian cooking that helped to some extent. Most of my trials would be sweets (my favorite of course) though M never had / has a sweet tooth and my son was an infant. It didn't even matter that I was the only person who had to consume all those sugar, butter - laden treats. I was thin as a stick then and so calories didn't come into picture at all. :) Everyday there would be a special.
When I reflect back, I think that I used to cook more borrowed recipes from internet then compared to now. Some of them have found a permanent place in my recipe repertoire. This delicious and easy to cook ABC halwa is one such recipe that has been cooked many times in my kitchen. Today's version is microwave based and doesn't use even a drop of ghee. It takes around 15 minutes to prepare and the only things you do are put the mixture in the MW and stir 3 -4 times.

Ingredients for 2 servings:
  • 1 apple
  • 1 carrot
  • 1 banana
  • 1/2 cup milk
  • 1/2 cup sugar
  • 1/2 tsp cardamom powder
  • For garnish - Chopped nuts or ghee toasted Cashews

Method:
* Peel the apple & carrot and grate them. Mash the banana.
* Add the prepared fruits and the milk in a microwave safe bowl. Cook till it is done and the whole mixture comes together. It may take around 10 - 12 minutes and keep stirring in between.
* Add sugar and cardamom powder to the cooked halwa and put it back in the MW for a couple of minutes more.
* Garnish with nuts or ghee toasted cashews.


This goes to all these lovely events
1. My CFK - Festive Foods, an event originally started by Sharmi.
2. Smitha's MEC - Festive dishes, an event originally started by Srivalli.
3. Priya's Veggie / Fruit a month - Apple
4. Ayesha's Anyone can cook event.
5. Akheela's Food Palette Series - Orange

Via Veggie Platter

Masala Baath - Maharashtrian Rice

Sometimes we need to change our daily lunch menu with some variety rice, while going through Madhuri's Ma Recipes, i got hooked with this masala baath which ressembles quite like vangi baath but this dish doesnt go for tamarind or for a special vaangi baath powder, her clicks tempted me a lot and i tried out this rice for our today's lunch and served along with some crispy pakodas..This masala baath was a complete one pot meal which doesnt even need anything as side dish, a prefect lunch box menu too..Thanks to Madhuri for sharing this Masala Baath and we loved it..

Masalabath
Ingredients:
  • 2cups Basmati rice
  • 4nos Long purple brinjals
  • 1/4tsp Tamarind pulp
  • 6nos Dry red chillies
  • 2tsp Coriander seeds
  • 1/2cup Grated coconut
  • 1tsp Cumin seeds
  • 2nos Whole spices (bay leaves, cloves, green cardamoms)
  • 1tsp Turmeric powder
  • Few Cashew nuts
  • Salt
  • Oil
Method:
Wash and soak the rice in water for 15minutes, meanwhile chop the brinjals as cubes and let them sit in water with pinch of salt and tamarind pulp..roast the red dry chillies, coriander seeds, grated coconut ,cumin seeds one by one and grind as fine paste with some water..

In a pan, heat enough oil and fry the cloves, cardamoms, bay leaves until they turns brown, add the chopped brinjal, turmeric powder and cook for few minutes, add the grounded masala and sauté for few minutes in medium flame...now gently add the rice, 4 cups of boiling water and salt..

Cook everything in high flame for 5minutes, put the flame to simmer and cook until the rice get cooked and the water get completely absorbed, finally add the cashew nuts toss everything gently..Serve hot with any raita..

Via Priya's Easy N Tasty Recipes

MuLyachi Kadhi - Radish buttermilk Soup


Mom often adds some flavorful veggies like radishes or drumsticks/shevgyachya shenga to her usual kadhi. Each veggie adds a unique flavor to the kadhi.

MuLyachi Kadhi
Radish Buttermilk Soup
Ingredients

  • Whisk together
  • 1 cup plain yogurt
  • 2 cups water
  • 2 tbsp chickpea flour/besan

Tempering
  • 2 tsp oil or ghee
  • 1/2 tsp mustard seeds
  • 1/2 tsp cumin seeds
  • 1/4 tsp fenugreek seeds
  • 1/4 tsp asafoetida
  • 1/2 tsp turmeric powder
  • 1 sprig curry leaves, not torn/use the whole sprig
  • 2 green chilies, slit
  • 1 tsp grated ginger

You will also need,
A generous pinch of sugar
salt to taste

Method
1. Heat oil or ghee in a saucepan. Add all the ingredients for tempering.
2. Add cut radishes, 1/4 cup water. Cover with a lid and let it cook for 10-12 minutes till radishes are cooked.
3. Add buttermilk mixture. Stir continuously.
4. Add salt and sugar. Bring to boil.
5. Switch off the gas.

Note -
1. Keep stirring the boiling kadhi so it won't curdle.

Via Enjoy Indian Food

Verusenagapappu Unda / Peanut Laddu


The rich and crunchy peanuts encased in sweet jaggery syrup are a real treat indeed. I am sure many are with me on this. :) I am obsessed with this simple peanut - jaggery concoction whether in a laddu (round) form or as a brittle since my school days. Even today, a visit to Indian grocer wouldn't complete without these.
At last, I could learn how to make them at home from my mother when she visited us recently. Though this recipe doesn't need much expertise, knowing the consistency of the jaggery syrup is an important aspect.

Ingredients for about 25 laddus:
  • 1.5 cup powdered jaggery
  • 1/2 cup water
  • 2.5 cup peanuts - roasted, skinned and halved


Method:
Keep a small plate with cold water ready by stove side to test whether jaggery syrup is done. Add jaggery and water to a big, sturdy, thick-bottomed vessel or a non-stick pan and keep stirring on low flame. Soon the jaggery starts to melt and concentrate. Boil this syrup till it reaches a rollable hard ball consistency. To test, add few drops of jaggery syrup to the cold water and roll the syrup with your fingers to form a ball. It should keep its shape without melting in spite of tilting the plate to different directions.
* Add the peanuts quickly and stir well so that the jaggery syrup coats evenly to the pieces. Turn off the stove. Leave the mixture for about five minutes to cool. While still warm, take a small portion of the mixture and shape it into a ball. Wet your hands in between if needed. Repeat the process with the remaining mixture.

These are going to my CFK - Festive Foods, an event originally started by Sharmi.

Via Veggie Platter

Poppyseeds & Quinoa Spice Powder

Most of us would have heard or made poppy seeds spice powder which goes terribly awesome with hot steaming rice topped ghee and papads, this is my version of that same poppy seeds powder with quinoa..Needless to say that this podi tastes fabulous eventhough i have added quinoa in this spice powder..This powder goes always fabulous to spice up many dishes, yep i tried making a stir fry with broad beans and potatoes with this powder and pepper powder and its tastes awesome, i'll be posting them very soon too..This poppy seeds spice powder can be enjoyed very well with rice also ....Obviously this is my one more entry to CWS-Poppy Seeds guest hosted by Sudeshna, event by me..

Poppy seeds podi
Ingredients:
  • 2tbsp Poppy seeds
  • 2tbsp Quinoa
  • 5nos Red chillies
  • 2tbsp Coriander seeds
  • 2tsp Channa dal
  • 1tsp Urad dal
  • Salt
Method:
Dry roast the poppy seeds and quinoa together until they change colour,keep aside let it cool..heat few drops of oil and roast the coriander seeds, channa dal, urad dal, red chillies..Grind everything with salt until bit coarse powder..

Conserve in air tightened box..Enjoy with rice!

Via Priya's Easy N Tasty Recipes

Bottle Gourd Dosa

Bottle Gourd Dosa
Anapakaya Dosalu.

Bottle gourd is chopped up with its skin intact and ground into fine paste. Here, rice flour and sooji is mixed with pureed bottle gourd for the batter. The batter is then poured onto hot pan and cooked till the dosa turns crisp. Serve bottle gourd dosa immediately with any pickle or sambar or chutney of your choice.
Makes: around 15 Bottle Gourd Dosa.

Ingredients:

  • Bottle Gourd Juice 1 Cup
  • Rice Flour 3/4 Cup
  • Fine Sooji 1/4 Cup
  • Green Chile 2 – 3
  • Cumin Seeds 1/2 tsp
  • Cilantro Few Sprigs
  • Salt to taste
  • Oil as Required

Method of preparation:

Wash, remove stem and roughly chop the green chiles.
Coarsely grind the green chiles using a grinder.
Wash, lightly scrape and roughly chop the bottle gourd.
Grind the bottle gourd with few tablespoons of water into smooth paste.
Clean, separate leaves, wash and finely chop the cilantro.

In a mixing bowl, mix together rice flour, ground bottle gourd, green chile paste, sooji, cumin seeds, cilantro, curry leaves and salt.
Add enough water to make it somewhat thin batter.

Heat a flat pan on medium high heat, apply few drops of oil with back of a spoon.
When pan gets hot, pour a ladle full of bottle gourd dosa batter on pan in circular motions.
Make sure batter is thin enough that it makes small holes when it hits the hot pan.
Try to fill up any big holes and form into 6 – 7 inch diameter dosa.
Don’t spread the dosa with back of the ladle.

Fry till bottom side starts to turn golden brown.
Pour few drops of oil on top and turn on other side.
Reduce the heat a bit and cook on this side for around a minute before removing from heat.
Repeat the same with remaining bottle gourd gourd dosa batter.
Serve bottle gourd dosa immediately with sambar or with any chutney of your choice.
Notes: Make sure lauki dosa is little crisp before removing from heat.

Suggestions: If the lauki dosa doesn’t come out crisp, make sure the pan is hot all the time. Don’t spread the batter once it hits the pan. Let it take its time to cook and crisp up. If the dosa doesn’t come out of the pan, make sure dosa batter is not too thin. If dosa comes thick, make sure batter is not too thick by adjusting with water.
Variations: You can also add finely chopped onion or grated carrot to the bottle gourd dosa batter.
Other Names: Bottle Gourd Dosa, Anapakaya Dosalu, Sorakaya Dosa.


Via Talimpu

Aloo Palak Pulao

Everyone in at my place loves spinach as anything, after making some fried rice, fried pakodas with spinach, my recent rice dish is this aloo palak pulao, most of us never says no to anything with potatoes and we guys are huge fan of this beautiful veggie, with spinach its double ok for us..I can definitely say that aloo palak is our all time favourite and this pulao was one of the best and better way of feeding my family members with aloo and palak..This pulao goes absolutely for easy preparation and its tastes fabulous, yep needless to say aloo and palak in rice never goes wrong..Along with papads, raitas or with simply chicken fries, this pulao goes tremendous and its tastes extremely awesome even as lunch box menu..Do try friends u will definitely love this pulao and damn sure that this combo never fails at all..

Aloo palak pulao
Ingredients:
  • 2nos Potatoes (big & cubed)
  • 2cups Spinach (chopped)
  • 2cups Basmati rice
  • 1no Onions(big & chopped)
  • 1tsp Ginger garlic paste
  • 1tsp Red chilly powder
  • 1tsp Garam masala powder
  • 1/4tsp Pepper powder
  • 1/2tsp Cumin seed powder
  • Salt
  • Oil
  • 2nos Bay leaves
  • 1tsp Fennel seeds
  • 2nos Cardamoms
Method:
Wash and soak basmati rice for 5minutes with 4cups of water, meanwhile heat enough oil in a heavy bottomed vessel or pressure cooker, fry the bay leaves, fennel seeds and cardamom, immediately add the chopped onions, ginger garlic paste with salt,cook until the onions turns transculent, add the chopped potatoes and sauté along with red chilly powder, garam masala powder, pepper powder and cumin powder, until the potatoes get half cooked..now add the chopped spinach leaves, just sauté for few seconds..Strain the soaked water from the basmati rice and add to the cooking veggies, bring to boil..Add the soaked rice to the cooking water, cook everything in high flame for few minutes, (if u r using pressure cooker,cook for two whistles and put off the stove)put off the flame in simmer..

Cook until the rice get well cooked and water gets completely absorbed..Serve along with papads, raitas or spicy chicken fries..


Via Priya's Easy N Tasty Recipes

Prawn & Spring Onion Masala

Been born and brought up in a seashore city, we guys love to have atleast twice a week some seafoods, but coz of Navarathiri and many more festivals i couldnt make seafood fries or dishes since quite a long, this weekend i prepared some prawn masala along with spring onions instead of onions, yep i used spring onions and the flavour of spring onions turned out this prawn masala truly delicious.. With hot steaming rasam this masala goes prefectly yummy and my hubby was really happy to enjoy this prawn masala with his sambar rice after a long, needless to say how he was happy to enjoy this prawn masala..

Prawn & Spring Onion Masala

Ingredients:
  • 1/2kg Prawns (cleaned)
  • 1cup Spring onions (white & green part,chopped)
  • 2no Tomatoes (chopped)
  • 1tsp Fennel seeds
  • 5nos Garlic cloves
  • 1tsp Red chilly powder
  • 1tsp Coriander powder
  • Few curry leaves
  • Salt
  • Oil
  • Chopped coriander leaves
Method:
Heat enough oil, sauté the chopped spring onions,curry leaves and chopped tomatoes until they turns soft, meanwhile grind the fennel seeds and garlic as fine paste, add this paste to the cooking veggies and sauté for few minutes, add now the cleaned prawns and sauté until the prawns turns pink, immediately add the red chilly powder, coriander powder and salt, cook everything in high flame for 2minutes, put the flame in simmer, close the pan with lid..

Cook the prawns until the oil get separates, finally add the chopped coriander leaves and serve hot..


Via Priya's Easy N Tasty Recipes

MuLyachi DaaL


I know you are wondering about exactly how many bunches of radishes I bought from the farmers' market!! But the truth is that I do get carried away when it comes to shopping at the local markets!:-D

MuLyachi DaaL
Radish Daal Curry
Ingredients

Pressure cook
1/2 cup toor daal
1 big piece of daikon radish, peeled & chopped into semi-circles
1 tbsp chopped onion
1/4 tsp asafoetida
1/2 tsp turmeric powder

Grind to paste
2 tbsp fresh coconut
1 tbsp onion
5 black peppercorns
1 tsp coriader seeds

Tempering
1 tbsp oil
1 sprig curry leaves
1/2 tsp cumin seeds
1/2 tsp mustard seeds
1/4 tsp asafoetida
1/2 tsp turmeric powder

You will also need
1 tsp jaggery
3 kokums, rinsed
salt to taste

Method
1. Pressure cook toor daal with remaining ingredients under pressure cook, adding 1 cup water. Set aside.
2. Heat oil in a saucepan. Add tempering ingredients
3. As they sizzle, add daal, coconut paste and water to adjust the consistency.
4. Add jaggery, kokum and salt.
5. Bring to boil. Switch the gas to low. Simmer for 5-10 minutes.
6. Serve hot with plain rice and ghee/clarified butter.

Note -
1. You can mash cooked daal but take care not to mash the radishes.


Via Enjoy Indian Food

Sprouted Kala Channa Kurma

Sprouting is quite a routine at my place, we guys never ever say no to any sort of dishes with sprouts, our recent favourite is this sprouted black channa kurma..This kurma goes fabulous with hot steaming rice, also along with rotis, breakfast dishes like idli, dosai or just with toasted breads...Poppy seeds and coconut used in this kurma turned them very delicious at the same time as a thick kurma,if u dont like coconut u can completely omit them by replacing the cashew nuts, u may think whether this kurma is quite a rich gravy, may be but i dont bother to make sometimes these sort of gravies with either coconut or cashewnuts also at the same time this kurma.This is my another entry to CWS-Poppyseeds guest hosted by Sudeshna, event by me..

Sprouted Kala Channa Kurma
Ingredients:
  • 2cups Sprouted kala channa (pressure cooked)
  • 1no Onion (chopped)
  • 2nos Tomatoes (chopped)
  • 3nos Green chillies (slit opened)
  • 1tsp Ginger garlic paste
  • 2nos Whole spices (bay leaves, cloves, cardamoms, cinnamonstick)
  • Salt
  • Chopped coriander leaves
  • Oil
To Grind
  • 1tbsp Poppy seeds
  • 1tbsp Coriander seeds
  • 1tsp Fennel seeds
  • 1/4cup Coconut (grated)
Method:
Dry roast one by one all the ingredients from the list 'To Grind', ground everything as fine paste with enough water...

Heat enough oil, fry the whole spices until brown, add the finely chopped onions, finely chopped tomatoes ,slit opened green chillies, ginger garlic paste and saute everything until the veggies turns transculent, now add the grounded paste,cooked sprouted kala channa,red chilly powder,salt and saute for few minutes..add enough water, and cook everything in simmer for few minutes until the gravy turns thick, finally add the chopped coriander leaves and put off the stove...

Enjoy along with rotis or any rice dishes...


Via Priya's Easy N Tasty Recipes

Dhingri Mutter

Most of my followers or my foodie bloggers would have know that am the mega winner of Food For 7Stages of Life hosted at Radhika's space, i won two cookbooks and one among those books was Punjabi subzis, i tried this dhingri mutter from that book by Tarla Dalal, this mushroom and green peas gravy tastes absolutely divine with rotis and even we loved it along with idlies and crispy dosas, i love Mrs Tarla Dalal's cook books much,when i won this book i was very excited to make many delicious subzis, this tomato based gravy with mushroom and green peas goes for an easy cooking process eventhough the ingredients goes for a bit long list...We loved this mushroom and green peas gravy very much along with ghee rice, yep both together goes prefect..

Dhingri Mutter
Ingredients:
  • 2cups Mushrooms (chopped)
  • 1cup Boiled green peas
  • 2tbsp Tomato ketchup
  • 1tsp Chilly powder
  • 1/4tsp Garam masala powder
  • 2tbsp Cream
  • 1tbsp Butter
  • Salt
  • Chopped coriander leaves
For Gravy:
  • 1cup Onions(sliced)
  • 1/2cup Tomatoes
  • 2tbsp Melon seeds
  • 1no Green chilli
  • 2nos Dry red chillies
  • 1tbsp Ginger
  • 4nos Garlic cloves
  • Oil
Method:
Heat enough oil in a pan, add the onions given in the list for gravy and saut& until they turns golden brown, keep aside..Take the tomatoes, melon seeds, green chilli, red chillies, ginger and garlic in a pan with half a cup of water and cook in simmer flame for 15minutes, cool and keep aside..Blend as smooth paste this cooked tomatoes chunks and browned onions together..Heat again some oil, sauté this paste in simmer for 20minutes till the mixture leaves oil..

Now heat the butter in a pan, add the mushrooms, peas and sauté till the mushrooms gets almost cooked, add the prepared gravy, tomato ketchup,chilli powder, garam masala, chopped coriander leaves, cream,salt and enough water, bring everything to boil..put the flame in simmer and cook for few minutes or until the gravy gets thickens..

Serve hot with rotis, rice etc..
Via Priya's Easy N Tasty Recipes

kochchoLi


I made this simple radish salad with the baby radishes that I got from the farmers' market.

KochchoLi
Radish Salad
Ingredients
  • 1 medium radish or 1 bunch of baby radishes
  • 1 cup plain yogurt
  • 1 tbsp ginger, minced

Grind to a paste
  • 2 tbsp fresh coconut
  • 2 green chilies

Tempering
  • 2 tsp oil
  • 1/2 tsp mustard seeds
  • 1/4 tsp asafoetida
  • 1 sprig curry leaves, torn

Method
1. Peel and chop radishes very finely.
2. Stir in all the remaining ingredients including coconut paste.
3. Heat oil in a saucepan. Add the tempering ingredients
4. Drizzle the tempered oil over the salad.
5. Mix well and serve as a side dish.

Note -
1. The name kochchoLi suggests finely chopped so do not grate the radishes for this recipe.
2. Traditionally, coconut oil is used for tempering.

Via EnjoyIndian Food

Khotte - my way


My grandmother's house in South Mumbai was admired by all of our Konkani relatives. The reason was a big jackfruit tree within the compound(fence). The tree was so planted that its branches used to peer in grandma's kitchen balcony and window. What else does a Konkani want when jackfruit leaves are just within your arms reach? I mean devouring Khotte by just plucking those fresh jackfruit leaves right outside the kitchen window was a dream come true for the people in Mumbai.

Here in US, I haven't seen jackfruit leaves. I have seen the whole jackfruit in Chinatown, but am not so lucky to see the jackfruit leaves. Banana leaves are easily available in Chinatown. I use them to make panki, pannoli, ghavan etc. When I made pannoli, I thought of adding idli batter just the way I made pannoli. When I did it next time, I wanted to be even more adventurous. I decided to make a coneshaped roll of banana leaves, twisted a little at end so the batter won't drip and used a toothpick to hold the shape. (My grandmother used jackfruit leaves to make a cup and used small sticks called - choi -in Konkani to hold the shape). I poured idli batter and steamed it. Though it didn't have the same flavor of jackfruit leaves, it gave the flavor of banana leaves. It was unique as well. It sure was a delicacy and everyone was excited to open their individualized idli wrapper!


Khotte with Banana Leaves
Idlies steamed with banana leaves

Ingredients
  • Idli batter
  • Banana leaves
Method
1. Cut banana leaves into 4 rectangles each.
2. Roll into a cone shape. Twist at the bottom of each cone.
3. Use toothpick so each cone holds its shape. Keep all the cones ready.

4. Pour water in a steamer. Bring to boil.
5. Pour idli batter in each cone.
6. Place vertically so the batter won't drip. Cover with a lid
7. Steam for 25-30 minutes.
8. Serve hot khotte with chutney of your choice.

Note -
1. For a traditional flavor, serve khotte with a few drops of coconut oil.
2. First I tried steaming for 20 minutes. But it wasn't cooked the whole way. So I steamed it for 10 more minutes.

Pepper Rice

I came across this pepper rice at Kurinji's Space,the simplicity of this rice attracted me a lot coz my mom used to make this pepper rice with shallots, but Kurinji went for a simple, quick and easy preparation for making this rice..I loved this rice also this rice tastes absolutely awesome also a completely one pot meal, u doesnt even need anything as side dish, may be some papads but i enjoyed this rice without any side dish..Fresh grounded pepper and cumin powder added to this rice turned them super delicious with a fabulous flavour, thanks to Kurinji for sharing this easy pepper rice, will post soon my mom's version very soon..Sending this rice to Nupur's BB#8-One Dish Meals..

Pepper rice
Ingredients:
  • 1cup Cooked rice
  • 1/2tsp Mustard seeds
  • 1/2tsp Urad dal
  • 1tsp Channa dal
  • 1/4cup Grated coconut
  • 2nos Dry red chillies
  • Few curry leaves
  • 1/4tsp Asafoetida powder
  • Salt
  • 2tbsp Peppercorns
  • 1tbsp Cumin seeds
Method:
Dry roast the peppercorns and cumin seeds, until the aroma comes out, grind them as fine powder and keep aside..Heat enough oil, let splutters mustard seeds, urad dal, channa dal..add the red chillies,curry leaves asafoetida powder, fry until the chillies turn brown..add immediately the grated coconut and saute for few minutes, meanwhile add the grounded pepper-cumin powder and salt to the cooked rice, mix well and keep aside..Once the coconut get roasted add the rice and saute for few minutes..put off the stove..

Turai Methi

Turai Methi
Menthikura Beerakaya.

Ridge gourd is scraped, chopped and boiled till soft. Oil is tempered with garlic and spices. Then the fenugreek leaves are briefly fried before adding the cooked ridge gourd and the tamarind extract. Serve turai methi with steamed rice or with roti.
Makes: around 3 Servings of Turai Methi.

Ingredients:

  • Ridge Gourd 8 – 10 inch Long
  • Green Chiles 3 – 4
  • Fenugreek Leaves 1 Cup Packed
  • Garlic 3 Cloves
  • Tamarind 1 inch Sized Ball
  • Turmeric Powder a Pinch
  • Salt to taste

Talimpu:

  • Mustard Seeds 1/4 tsp
  • Cumin Seeds 1/4 tsp
  • Urad Dal 1/4 tsp
  • Broken Dried Red Chiles 3 – 4
  • Asafoetida a Big Pinch
  • Curry Leaves 4
  • Oil 2 tsps

Method of preparation:

Lightly scrape the thick skin, wash, remove ends and chop ridge gourd into small pieces (around a cup and half).
Remove stems, wash and slice the green chillies.
Peel and lightly mash the garlic cloves.
Separate leaves and wash the fenugreek leaves thoroughly.
Soak tamarind in few tablespoons of warm water for some time and extract all the thick juice.

Boil the ridge gourd pieces in around quarter cup of water till the ridge gourd turns soft but not mushy (around 10 minutes).

Heat oil in a pan, add all talimpu ingredients in order.
Then add the garlic cloves and green chiles.
Fry briefly, stir in fenugreek leaves and fry till the leaves wilt and start to change color.
Then stir in cooked ridge gourd, tamarind extract and turmeric powder.
Cook covered for around 5 minutes to let all the flavors develop.
Uncover, add salt and stir fry for few seconds to let any excess moisture evaporate.
Serve turai methi with steamed rice and a papad.
Notes: Make sure to cook the ridge gourd well.

Suggestions: If ridge gourd pieces are not cooked, add few tablespoons of water and cook covered till done. Fry the fenugreek leaves for longer time to reduce the magnitude of the bitterness.
Variations: You can also add few pinches of red chili powder just before removing from heat. Alternatively, cook the ridge gourd in the tempered oil instead of boiling.
Other Names: Turai Methi, Menthi Beerakaya, Menthikura Beerakaya.

Cracked Wheat - Coconut Kheer


The inspiration behind this healthy and yummy kheer were the ingredients that I had to use up sooner - the remaining stuff from an opened can of coconut milk, the leftover jaggery syrup from the one that was used in another sweet dish and a handful of cracked wheat that was lying in the jar for months.
Together the wholesome wheat and the sweet, tender coconut milk have transpired into a delectable delicacy redolent with flavors of edible camphor and cardamom, suitable for any festive occasion.

Ingredients for 6 servings:
  • 1/2 cup cracked wheat
  • 1 cup coconut milk (since the canned variety was too thicker, I substituted half the quantity with water)
  • 2 cups milk
  • Powdered jaggery/ brown sugar to taste
  • 1/8 tsp cardamom powder
  • A pinch of edible camphor
  • 1 Tbsp each - ghee, cashews & raisins

The cooking part:
* Cook the cracked wheat with coconut milk in a pressure cooker till it turns soft. (I cooked for about 10 whistles. If using thinner variety coconut milk, use about a cup. If using tinned one, substitute the half quantity with water.)
* Add the jaggery / brown sugar to the cooked cracked wheat and mix well so that it melts.
* Stir in the milk. Adjust the quantity to the desired consistency. Cook till the mixture comes to a rolling boil. Add the powdered cardamom and the edible camphor to the kheer. Lower the heat and let the kheer simmer for 5 minutes more and turn off the stove.
* Meanwhile, heat the ghee in a small pan and toast the raisins and cashews. Stir in them to the kheer.


Note: If using homemade coconut milk, the kheer can be prepared with it instead of adding milk.

This is going to be a part of
1. My CFK - Festive Foods, an event originally started by Sharmi.
2. Ayesha's Celebrate Sweets - Kheers, an event originally started by Nivedita.
3. Akila's Dish name starts with C
4. Priti's Only Festive Food, an event started by Pari.

Eggplant Dal

Eggplant Dal
Vankaya Pappu.

Oil is tempered with spices and dals. Indian eggplants / brinjals are chopped up and cooked in tempered oil till just soft. Then the cooked toor dal is added to the brinjals and cooked for last 5 minutes. Serve eggplant dal with steamed rice and a crispy papad.
Makes: around 2 Servings of Eggplant Dal.

Ingredients:

  • Toor Dal 1 Cup
  • Baby Eggplants 3
  • Green Chiles 3 – 4
  • Turmeric Powder a big pinch
  • Salt to taste

Talimpu:

  • Mustard Seeds 1/4 tsp
  • Cumin Seeds 1/4 tsp
  • Urad Dal 1/4 tsp
  • Broken Dried Red Chiles 4
  • Asafoetida a pinch
  • Curry Leaves 5
  • Oil 1 tbsp

Method of preparation:

Wash toor dal under fresh water to remove any dirt.
Remove stems, wash and chop the eggplant into small chunks.
Remove stems, wash and slice the green chiles.
Pressure cook the toor dal in 2 cups of water for 3 whistles.

Heat oil in a small pan, add all talimpu ingredients in order.
When mustard seeds start spluttering, add green chiles, chopped eggplant, turmeric powder and salt.
Fry for couple of seconds and cook covered till eggplant is soft but not mushy.
Stir occasionally if necessary.
Uncover, stir in cooked toor dal and adjust the salt.
Cook on low flame for around 5 minutes or until the dal and the eggplant is well cooked.
Serve eggplant dal with steamed rice and a crispy papad.
Notes: Make sure to add salt once the eggplant is added to the tempering.

Suggestions: Make sure dal is perfectly cooked before adding to the tempering. Also the green chiles can be added to the raw dal to cook for extra spice.
Variations: If the toor dal is cooked on a stove top, the eggplant and green chile pieces can be added to the toor dal during the last 10 minutes of the boiling time and then the dal can be tempered with spices.
Other Names: Eggplant Dal, Vankaya Pappu Kura.

Coconut Laddu

Photobucket

These sinfully delicious and decadently rich laddus are apt for any celebration and are easy ones to prepare in no time. It is such a simple and quick recipe that even a novice cook can woo and amaze guests with these mouthwatering laddus. And surprisingly, the recipe needs only two ingredients and about 10 - 15 minutes of time. If you are able to stir and shape the mixture into balls, you are eligible to try this. :)
These were a part of my early 'condensed milk' cooking escapades, about a dozen years ago, along with this equally delicious condensed milk halwa / theratti paal.

Ingredients for 20 laddus:
  • 14 oz condensed milk
  • 14 oz + 1/2 cup sweetened coconut flakes

Laddu making process:
* Pour the condensed milk and 14 oz sweetened coconut flakes into a thick bottomed kadai or a nonstick pan.
* Cook on medium flame for about 8 - 10 minutes, stirring quite often. Turn off the stove.
* When the mixture is cool, take about a lime sized mixture and shape into a ball. Repeat the process with the remaining mixture.
* Now roll the shaped laddus in the 1/2 cup coconut reserved, to avoid any stickiness if present. Store them in a container.
Photobucket

They are going to be a part of
1. My CFK - Festive Foods, an event originally started by Sharmi.
2. Ayesha's Anyone can cook event.
3. Akila's Dish name starts with C.
4. Preeti's Only Festive Food, an event started by Pari.

Dates Halwa

If u have loads of dates, just give a trial to this delicious halwa u wont regret at all also its a quick way to finish those dates sitting sadly since a long coz this halwa hardly goes for simple ingredients like pitted seedless dates, milk, sugar, ghee and cashewnuts..Its a beautiful halwa which suits prefect for a sweet tooth also at the same time loaded with many health values eventhough we use ghee in this halwa,coz i cant imagine halwa without ghee,if u dont like to use ghee u go for butter or else dalda, but the aroma of the ghee suits absolutely prefect for making dates halwa..One more easy breezy diwali sweets am gonna prepare for the sure, yep this halwa goes for easy cooking process and even my little one loved it..

Dates Halwa
Ingredients:
  • 1cup Pitted seedless dates
  • 1cup Milk
  • 1/2cup Sugar
  • 2tbsp Ghee
  • 20nos Cashew nuts
Method:
Fry the cashew nuts until they turns golden brown, keep aside..In an another pan, cook the dates and milk until they turns soft..let it cool and grind as fine paste..Cook the dates paste and sugar until its turns as thick paste, add the ghee and the roasted cashew nuts, stir continously..this paste will get off from the bottom of the pan after few minutes, immediately pour this halwa in a greased pan and cut as u desire once they get cooled..

Enjoy..Can stay prefect in room temperature for 2-3days..

Baingan Bharta

Baingan bharta, famous Punjabi roasted mashed eggplant dip was one of my favourite, this time i got hooked with Aipi's Baingan Bharta which i bookmarked at her space coz this mashed eggplant is prepared along with a variety of veggies which sounds quite delicious for me, yep this baingan bharta goes for cooked and mashed potatoes, bellpeppers and mushrooms which pulled me to try out this dish today for our dinner and i served this baingan bharta along with rotis, both together turned absolutely delicious our dinner and works out wonder..Thanks a ton to Aipi for sharing her hubby's way of making baingan bharta, hats off to ur man Aipi..Even my man loved it along with rotis which was a hard task for me always whenever i prepare anything with eggplants..Obviously this is my entry to Priya's & Aipi's Bookmarked Recipes..

Baingan Bharta
Ingredients:
  • 1no Large Eggplant
  • 2nos Potatoes (boiled & mashed)
  • 2nos Tomatoes (big & chopped)
  • 1/2cup Mushrooms (sliced)
  • 1no Green bellpepper (chopped)
  • 1no Onion (big & chopped)
  • 7nos Garlic cloves (minced)
  • 1no Green chilly (chopped)
  • 1tsp Red chilly powder
  • 1tbsp Coriander powder
  • 1/2tsp Turmeric powder
  • 1/2tsp Amchur powder
  • 1/4tsp Mustard seeds
  • 1/2tsp Cumin seeds
  • 1/4tsp Asafoetida powder
  • Salt
  • Oil
  • 2tbsp Coriander leaves (chopped)
Method:
Poke 2-3 holes on the eggplant and microwave in high for 5minutes,take out the eggplant and spray some oil over the eggplant, broil the eggplant in oven for 30-40minutes on turning the eggplant every 15 minutes..Take out and keep aside..let it cool, peel the skin off the eggplant and scoop out the flesh and keep aside..

Heat oil in a pan, add the asafoetida powder, cumin seeds, mustard seeds and stir until the seeds crackle, add immediately the minced garlic and chopped green chillies, saute until they turns golden brown, add the chopped onions, salt and saute for few minutes, add the bell pepper and saute for few minutes, immediately add the mushroom and cook everything in high..Immediately add the tomatoes, turmeric powder until the tomatoes turn mushy..Add the mashed potatoes and eggplant flesh with the coriander powder and mix, cook everything in lower flame..

Keep mashing the veggies, now add the red chilly powder and amchur powder..keep stirring until the mixture turns thick..Serve hot with rotis,rice or along with bread toast..

Trevti Daal


Trevti means 3 daals. This daal tastes good with rice or rotla/bhakri.


Trevti Daal
Three daals
Ingredients
  • 1/4 cup toor daal
  • 1/4 cup yellow moong daal
  • 1/4 cup chana daal
  • Salt to taste
  • 1/2 tsp mild chili powder
  • 1 tsp Gujarati garam masala
Tempering
  • 2 tsp oil
  • 1/2 tsp mustard seeds
  • 1/2 tsp cumin seeds
  • 1/4 tsp asafoetida
  • 1/2 tsp turmeric powder
  • 1 small onion, chopped
  • 2-3 cloves garlic, chopped
  • 1 tomato, chopped

Method
1. Wash and pressure cook 3 daals. Mash and set aside.
2. Heat oil in a saucepan. Add all the spices. As they sizzle, add onion and garlic. Saute till onion is soft.
3. Add tomato and saute again for about 5 minutes.
4. Now, add chili powder and garam masala. Saute for 1 minute.
5. Add mashed daal and water to adjust the consistency.
6. Add salt and bring to a rapid boil.
7. Switch the gas to low. Let it simmer for 5 minutes.

Note -
1. Paprika can be used as a mild chili powder.


Check out
Jagruti's version

Strawberry Jelly

Watever as jelly goes immediately to my favourite, while cleaning my freezer i came across a packet of frozen strawberries which i have freezed few months back..Since the quantity of strawberries was nt that much enough to makes bakes or any sort of desserts, i thought of making them as jelly using agar agar powder with a fresh strawberry juice..This jelly was quite refreshing, delicious and tastes absolutely yummy..This strawberry jelly was an excellent dessert to enjoy after a simple lunch as its really goes for simple ingredients..

Strawberry jelly
Ingredients:
  • 2cups Strawberry juice
  • 1tbsp Agar agar powder
  • 1/4cup Sugar
  • a pinch Red colour
Method:
Add the sugar to the strawberry juice, mix everything welll and strain the juice keep aside..heat the agar agar powder,food colouring with half a cup of strawberry juice, slowly add this heated juice to the fresh strawberry juice, pour this mixture to the any sort of moulds and arrange in fridge for an hour..

Enjoy chilled..

Punjabi Chole(y)~~T&T from Chef In You

I can have with anything channa masala, even along with idlies, yeah i love it that much..I really wanted to try the famous and quite popular Punjabi chole,this weekend i prepared this Punjabi chole from Dk's Chef In You coz her Punjabi chole was quite an easier preparation also goes for really for some simple ingredients, i have completely got hooked to her version, as usual its a big hit at home and we enjoyed having with rotis..This channa masala of Punjabi goes for a dark gravy coz of pressure cooking chickpeas with a tea bag, thats y the white channas looks like black chickpeas in the gravy and we thoroughly loved this dark coloured channa masala..Thanks to Dk for sharing this yummyilicious gravy, obviously this Punjabi choley goes directly to T&T - Chef In You guest hosted by me, event by Lakshmi, since i didnt have tamarind paste i just went for amchur powder, this masala was quite a different gravy with bit tanginess, bit sweetness and spiciness..

Punjabi Choley
Ingredients:
  • 1cup Chickpeas (soaked )
  • 1no Tea bag
  • 1no Bay leaf
  • 1/4tsp Turmeric powder

For Masala:
  • 1no Onion
  • 2nos Tomatoes (chopped)
  • 2tbsp Tomato puree
  • 1/2tsp Shahjeera
  • 1tsp Ginger garlic paste
  • 1/2tsp Cumin powder
  • 1tsp Coriander powder
  • 1tbsp Amchur powder or 1tbsp tamarind paste
  • 1tsp Red chilly powder
  • Salt
  • Few chopped onion for garnishing
Method:
Cook the chickpeas with turmeric powder, bay leaf and teabag in a pressure cooker upto three whistles, heat enough butter or oil,add the shahjeera and fry, immediately add the cumin powder, coriander powder and saute for few seconds ..Add the chopped onions,salt, ginger garlic paste and saute until the raw smell goes away..now add the chopped tomatoes, tomato puree and cook the veggies becomes mushy, meanwhile remove the tea bag and bay leaf from the chickpeas and pour the cooked chickpeas, amchur powder with the cooked water to the veggies, add more water if needed..

Bring to boil and smash few chickpeas while cooking the gravy..cook until the masala get thickens..Serve hot garnished with chopped onions and along with rotis..

Fresh Coconut Raita

Fresh Coconut Raita
Kobbari Perugu Pachadi.

Freshly scraped coconut is used while making this raita. Yogurt is whisked with coconut and tempered with spices and dried fruits. This version of coconut raita is hot and sweet at the same time. Serve fresh coconut raita with biryani or with paratha.
Makes: around 2 Cups of Fresh Coconut Raita.

Ingredients:

  • Plain Yogurt 1 1/2 Cups
  • Freshly Scraped Coconut 1/2 Cup
  • Onion 1/2 Small
  • Green Chiles 2
  • Raisins 6
  • Cashews 3
  • Salt to taste

Talimpu:

  • Mustard Seeds 1/4 tsp
  • Cumin Seeds 1/4 tsp
  • Urad Dal 1/4 tsp
  • Broken Red Chiles 4
  • Curry Leaves 4
  • Oil 1 tsp

Method of preparation:

Remove stems, wash and slice the green chiles.
Peel and finely chop the onion.
Whisk yogurt with scraped coconut, few tablespoons of water and salt.

Heat oil in a pan, add all talimpu ingredients in order.
When mustard seeds start spluttering, add green chiles, onion, raisins and cashews.
Fry till onion becomes translucent and changes color, remove from heat.
Let the tempering cool a bit before adding to the yogurt bowl.
Mix well and serve fresh coconut raita with biryani or with paratha.
Notes: Make sure to get the scraped coconut instead of grated coconut when using frozen coconut.

Suggestions: Adjust the consistency of the raita with water.
Variations: You can also add finely chopped cilantro to the coconut raita if you wish.
Other Names: Fresh Coconut Raita, Kobbari Perugu Pachadi.

Fenugreek Leaves Dosa

Fenugreek Leaves Dosa
Menthi Aku Dosalu.

This is a very flavorful and aromatic dosa made with fenugreek leaves / methi. A batter is prepared with rice flour and besan. Fresh fenugreek leaves are added to the batter and poured onto hot pan for fenugreek leaves dosa. When dosa crisps up, fenugreek leaves dosa can be served with any chutney or sambar.
Makes: around 4 5-inch Fenugreek Leaves Dosa.

Ingredients:

  • Fenugreek Leaves a Handful
  • Rice Flour 4 Tbsps
  • Besan 1 Tbsp
  • Cumin Seeds 1/4 tsp
  • Red Chili Powder 1/4 tsp
  • Curry Leaves 3
  • Salt to taste

Method of preparation:

Separate fenugreek leaves from its stems and wash them thoroughly.
If curry leaves are big, tear them into pieces.

In a mixing bowl, mix together rice flour, besan, cumin seeds, red chili powder, curry leaves and salt.
Add enough water to make it somewhat thin batter.

Heat a flat pan on medium high heat, apply few drops of oil with back of a spoon.
When pan gets hot, pour a ladle full of fenugreek dosa batter on pan in circular motions.
Make sure batter is thin enough that it makes small holes when it hits the hot pan.
Try to fill up any big holes and form into around 5 inch diameter dosa.
Don’t spread the dosa with back of the ladle.

Cook covered for couple of seconds for leaves to soften.
Uncover and fry till bottom side starts to turn golden brown.
Pour few drops of oil on top and turn on other side.
Reduce the heat a bit and cook on this side for around a minute before removing from heat.
Repeat the same with remaining fenugreek dosa batter.
Serve fenugreek dosa with sambar or with any chutney of your choice.
Notes: Make sure fenugreek dosa is little crisp before removing from heat.

Suggestions: Chopping the fenugreek leaves make the dosa bitter. But adjust the amount of fenugreek leaves for more flavor. If the dosa doesn’t come out of the pan, make sure dosa batter is not too thin. If dosa comes thick, make sure batter is not too thick, and adjust with water.
Variations: You can also add finely chopped onion or chopped nuts like cashews to the batter.
Other Names: Fenugreek Leaves Dosa, Methi Dosa, Menthi Aku Dosalu.

Fenugreek Leaves Chutney

Fenugreek Leaves Chutney
Menthi Kura Pachadi.

Fresh fenugreek leaves are cleaned and fried in oil along with urad dal and red chiles. It is then ground into fine paste along with tamarind and jaggery. Just before finishing the chutney, garlic and sesame seeds are added. Fenugreek leaves chutney can be served with steamed rice or with idly, dosa etc…
Makes: around a Cup of Fenugreek Leaves Chutney

Ingredients:

  • Fenugreek Leaves 3 – 4 Cups Packed
  • Whole Dried Red Chiles 3 – 5
  • Urad Dal 1 1/2 Tbsps
  • Tamarind 1 inch Sized Ball
  • Jaggery 1 inch Block
  • Garlic 3 Medium Cloves
  • Sesame Seeds 1 tsp
  • Salt to taste
  • Oil 1 tbsp

Method of preparation:

Separate the fenugreek leaves from its stems and wash them thoroughly.
Break red chiles into pieces
Peel the garlic cloves.
Soak tamarind in few tabelspoons of warm water and extract all the thick juice discarding the veins.
Microwave the tamarind for couple of seconds to make it soft if necessary.

Heat oil in a pan, add urad dal and in a few seconds add red chiles.
When urad dal changes color, add a garlic clove and fenugreek leaves.
Stir and fry till fenugreek leaves wilt and start to change color.
Remove from heat and let it come to room temperature.

Using a spice grinder, grind the above fenugreek leaves mixture, tamarind pulp, jaggery and salt into fine paste.
Finally add the garlic cloves and sesame seeds and grind for couple of seconds.
Remove fenugreek leaves chutney onto a bowl and serve with steamed rice or with idly, dosa etc…
Notes: Make sure to fry the fenugreek leaves well.

Suggestions: If its getting very hard to grind the mixture, then add few tablespoons of water to make the process easy. You could avoid soaking the tamarind if its very soft.
Variations: You can also dry roast the urad dal and red chiles and grind it first before grinding the leaves.
Other Names: Fenugreek Leaves Chutney, Menthi Aku Pachadi, Menthi Kura Pachadi, Methi Chutney.

Gooseberry Rice

Gooseberry Rice
Usirikaya Pulihora.

Gooseberry / Amla is chopped up and ground into paste with coconut and green chiles. Oil is tempered with spices and the gooseberry paste is briefly fried till the raw smell is gone. Finally steamed rice is mixed with the tempering and gooseberry rice is served immediately with pickle or raita.
Makes: around 3 Servings of Gooseberry Rice.

Ingredients:

  • Raw Rice 1 1/2 cups
  • Gooseberry (Fresh or Frozen) 5 – 6
  • Grated Coconut 1/2 Cup
  • Green Chiles 4 – 5
  • Turmeric Powder few Pinches
  • Salt to taste

Talimpu:

  • Mustard Seeds 1/2 tsp
  • Cumin Seeds 1/2 tsp
  • Chana Dal 1/2 tsp
  • Urad Dal 1/2 tsp
  • Broken Red Chiles 5
  • Asafoetida a pinch
  • Curry Leaves 6
  • Oil 1 tbsp

Method of preparation:

Wash and chop the gooseberry around the seed and discard the seed and chop up the flesh.
Remove stems, wash and slice the green chiles.
Grind chopped gooseberry, coconut, green chiles and salt into paste adding enough water.

Refresh rice with water and cook in 3 cups of water until all the water has been absorbed and rice turns soft.
Fluff up the rice on a wide plate and keep aside.

Heat oil in a pan, add all talimpu ingredients in order.
When mustard seeds start spluttering, add ground gooseberry paste and turmeric powder.
Cook till the raw smell of the gooseberry and the green chile is gone (around 3 mintues).
Stir in steamed rice and fry for a minute or two to let the rice absorb all the flavors.
Cover and remove from heat.
Serve gooseberry rice immediately with raita or with any pickle.
Notes: Gooseberry rice can be prepared with leftover rice.

Suggestions: Make sure not to overcook the gooseberry paste once added to the pan.
Variations: You can also add chopped onion and cilantro to the tempering if you wish. Roasted peanuts are also generally added to the rice.
Other Names: Gooseberry Rice, Amla Rice, Usirikaya Annam, Usirikaya Pulihora.

Cabbage Sambharo

Though the method of preparation is somewhat similar to making subzis, this is actually the recipe of a salad. Hence, make sure that cabbage remains crunchy as you stir fry quickly on a hot flame.


Kobij sambhara
Stir fried Cabbage Salad
Ingredients
  • 1 small cabbage head, roughly shredded
  • 1/2 tsp ginger, roughly shredded
  • salt to taste

Tempering
  • 2 tbsp oil (or more!)
  • 1 tsp mustard seeds
  • 12 tsp asafoetida
  • 1/2 tsp turmeric powder

Garnish
  • 1 lemon, freshly squeezed

Method
1. Heat oil in a wide saucepan or kadai or a wok. Add spices. As they sizzle, add shredded ginger and cabbage.
2. Stir fry quickly on a high flame till the cabbage is coated with oil.
3. Add salt and switch off the gas.
4. Do not cover with a lid.
5. Squeeze some fresh lemon juice as the cabbage cools down.

Note -
1. This salad needs to be crunchy. Covering with a lid may make it mushy.
2. You can also add shredded carrots and bell peppers.
3. The traditional recipe needs more oil as the crunchy cabbage appears to be glistening with oil.

 
Disclaimer:
This site does not store any files on its server.We only index and link to content provided by other sites and also if you feel any copyrighted material is seen in this blog
please feel to write us....nagababu.gade@yahoo.co.in